DIGITAL PHOTOGRAPHY AND IMAGING - PROJECT 2 (Part A: Week 6-8 / Part B: Week 6-10)

Bachelor of Mass Communication
Digital Photography and Imaging
Notes and Exercises
____________________________________________________________________________________________________________
Project 2 (Part A: Self-Titled)
Week 6 (18/05/20)
During our tutorial class, Mr. Fauzi has a project 2 (Part A-Self-Tiltled) consultation with us. Then, we are required to find references for our project 2 on Pinterest and paste the link to discuss with lecturer.
 |
| Figure 22: My Reference for Project 2. Source from: Pinterest.
According to Mr. Fauzi, this design seems simple yet complex at the same time. In fact, the lighting and colour matching are of utmost important in this composition. Lighting determines not only brightness and darkness, but also tone, mood and atmosphere. Therefore, it is necessary to control and manipulate light correctly in order to get the best texture, vibrancy of colour and luminosity on our subjects. In this design, side lighting produces a far more interesting light, as it shows the shape of the subject much more and cast it in partial shadow giving it a more dramatic look.
|
 |
| Figure 23:Colour Scheme: The Tetrad - A Combination of Four Colours. |
Blue flowers surrounding the subject are a pop of color in the image as they create a strong focal point that instantly catches the audience's eye. This is a colour scheme that includes one primary and two complementary colours, plus an additional color that highlights the accents. An example: blue-green, blue-violet, orange-red, orange-yellow. Thus, it creates a colour harmony when we look at the design.
____________________________________________________________________________________________________________
Week 7 & 8 (30/05/20 & 01/06/20)
During these two weeks, Mr. Fauzi has a progression check for our self-titled project.
 |
| Figure 24: My Self-Titled Project. |
Eventually, I have come out with my final outcome of self-titled project. As shown in the project, the letter 'S' and me is the main focus. This is due to the fact that everything that I love starts with the letter 'S', including my name "Stella". I love singing, sharks, sea and the Sun since I was young. Therefore, I have combined these four favourite elements in my design. The sheet music shows my passion for singing, the ocean waves represent the sea, as well as the shark is self-explanatory. How about the display of sun? This detail has actually been revealed in the letter 'S' which all we can see is just a glint of light on broken glass. But broken glass just looks like the sunlight, isn't it? The audience can also paint a picture of me sitting on the letter 'S' with the waves beat behind me while the shark is swimming and singing nearby. It helps create a vivid look that can highlight the feeling of sound and movement. As such, I think it is undeniably the artwork which can best represent myself thus far.
____________________________________________________________________________________________________________
Project 2 (Part B: Photo Manipulation)
Write Rational of Conceptual with Sketches:
By following the Project 2 briefing slides, I am required to come out with an idea of partly making myself into a cyborg. I always imagine to make my leg to be a cyborg. My joint has become unstable and is more susceptible to future knee dislocations as I have once had a dislocated right knee. However, a leg cyborg can help avoid recurrence and allow me to do some yoga streches for the leg.
The leg cyborg has reproduced the complex leg movement and transcended the limitations of robotics in a wire-driven manner. Yet we can see a central chip with fewer electrodes under the leg's skin. The cyborg which is combined with prosthetic leg is also robust enough to allow yoga streches and help maintain movement.
The leg cyborg has reproduced the complex leg movement and transcended the limitations of robotics in a wire-driven manner. Yet we can see a central chip with fewer electrodes under the leg's skin. The cyborg which is combined with prosthetic leg is also robust enough to allow yoga streches and help maintain movement.
 |
| Figure 1: Sketches of My Leg Cyborg. |
____________________________________________________________________________________________________________
__________________________________________________________________________________________________________
2. Cyborg (Project 2 Part B) Demo:
Steps to Transform Cyborg:
__________________________________________________________________________________________________________
Steps to Transform Cyborg:
Week 6 (18/05/20)
1. Complete Class Exercises:
Today, Mr.Martin guided us to complete some class exercises by using Spot Healing Brush Tool. Clone Stamp Tool and Patch Tool.
 |
| Figure 2: Pimples Lady. |
 |
| Figure 3: Lady AFTER Removing Pimples. |
 |
| Figure 4: Pimples Girl. |
 |
| Figure 5: Girl AFTER Removing Pimples.
Our class exercises are to use Spot Healing Brush Tool to clear pimples. For alternatives, we can also use Clone Stamp Tool to do so ("Option"key and click to select one area and paste to other healing area).
If we choose to use Clone Stamp Tool, the pixels of selected area will be affected. However, using Spot Healing Brush Tool will improve the value of brightness of images and let the selected area blend better with other areas. The value of diffusion on top of tool bar can allow the more blend with the background. Yet the colour or structure of selection can still be adjusted once it is selected.
Besides, Content-Aware Move Tool is similar to a duplicate tool that can copy and paste a selection area.
|
 |
| Figure 6: Leopard Fur. |
 |
| Figure 7: Leopard Fur AFTER Removing Watermarks. |
 |
| Figure 8: Rock Sand with Watermarks. |
 |
| Figure 9: Rock Sand AFTER Removing Watermarks.
For the third and fourth images with watermarks, we can use Patch tool to remove them. To heal the bigger area, we can use Patch Tool. While for the small area, we can choose to use Spot Healing Brush Tool or Clone Stamp Tool.
|
2. Cyborg (Project 2 Part B) Demo:
 |
| Figure 10: Bora. |
 |
| Figure 11: Prosthetic Limb. |
 |
| Figure 12: Demo Outcome. |
 |
| Figure 13: My Bora Outcome. |
- Open Bora.jpeg
- Duplicate a background layer
- Use Pen Tool to mask out left shank (Work Path > Load path as a selection > Apply The Mask > Inverse > Hide original background layer)
- Create new layer
- Use Clone Stamp Tool and select "All Layers" to patch white background
- Create new layer (cross section layer)
- Use Elliptical Marquee Tool to create an oval
- Fill in colour (Edit>Fill>Colour)
- Use eyedropper to choose colour from shadow
- Free transform the size and angle of oval
- Use Wrap mode to adjust shape
- Duplicate that cross section layer and free transform it to the top of broken leg
- Free transform and use Wrap mode to adjust
- Place the layer under Bora new background layer
- Select cross section layer botom layer, then right click and choose "blending option"
- Adjust inner and outer glow of both cross section layers
- Open the metal skeleton image
- Crop and mask out the selection
- Command and click to stop a pen tool line so that can draw new line
- Move the prosthetic limb to project, free transform to adjust it
- Use Erase Tool for cleaning/ create new layer and use Brush Tool for cleaning (*rmb to make sure that "Sample:All Layers")
- Prosthetic limb phase is done
- Select all layers, select Command + G can merge layers and make them group as a file
- Duplicate a new layer
- Use Pen Tool to draw the line on leg according to preferences
- Brush > 5 pixel, hardness 100%
- Create new adjustment layer
- In pen tool area, select all paths, apply Stroke Subpath>Brush to the new layer
- Work Path>Load Selection
- Duplicate a background layer with prosthetic leg done
- Apply mask to the layer
- Load selection again, delete path, deselect selection
- Turn off visibility of stroke path layer
- Right click for "blending option", adjust Bevel & Emboss>Style: Inner Bevel
- Adjust Depth, Size, Soften, Highlight Mode and Shadow Mode
- Mask out leg, Filter>Blur>Surface Blur
- Cut down shadow by applying Levels
- Bora cyborg is done
__________________________________________________________________________________________________________
Week 7 (27/05/20)
1. Cyborg (Project 2 Part B) Demo 2: |
| Figure 14: Geisha. |
 |
| Figure 15: Machinery. |
 |
| Figure 16: Computer Board. |
 |
| Figure 17: Demo Outcome. |
 |
| Figure 18: My Geisha Outcome. |
- Open Geisha image
- Command + J to duplicate a background layer, named it as 'Cyborg'
- Hide original background layer
- Switch to white colour (white=show, black=hide)
- "x" key to swift colour (black - white)
- Brush Tool to brush out her skin
- Mask it out and Command + I to inverse
- Command + 0 to look at the entire image
- Select the cyborg layer, then choose Filter>Blur>Surface Blur
- Image>Adjustments>Levels
- Duplicate another original background layer
- 'Shift' key to select both new background copy layer and cyborg layer
- Command + E to merge the layers, named it as 'Geisha Cyborg'
- Use Pen Tool to mask out right face and make selection (* 'Option' key can adjust the pen tool lines)
- Command + Shift + J to cut to a new layer, named it as 'Face Skin'
- Right click the face skin layer, and choose blending options
- Adjust Bevel & Emboss and Drop Shadow
- Open Machinery layer
- Free Transform to adjust size and angle, place it under geisha cyborg layer
- Create new layer, named it as 'Face Edges'
- Use Brush Tool to draw face edges
- Filter>Noise
- Create new layer, named it as 'Shadow', place it above machinery layer
- Use Brush Tool to make shadow of machinery
- Filter>Blur>Gaussian Blur
- Command + Shift to select all the layers and Command + G to group them together
- Open Plug layer, masking with Pen Tool
- Filter>Distort>Pinch
- Move to main layer, Free Transfrom
- Blending mode change to Softlight, adjust blending options
- Make Oval shape in new layer
- Edit>Fill>Colour:Black
- Free Transform to adjust size and angle
- Use Pen Tool to draw skin edges
- Fill stroke (brush size 10 pixels, hardness 100%)
- Load selection (Command + Click the Oval layer, it'll show the selection of oval shape and skin edges/pen tool lines)
- Apply mask to Geisha cyborg layer and Command + I
- Hide previous oval shape and pen tool lines
- Right click to select blending options, adjust Bevel & Emboss
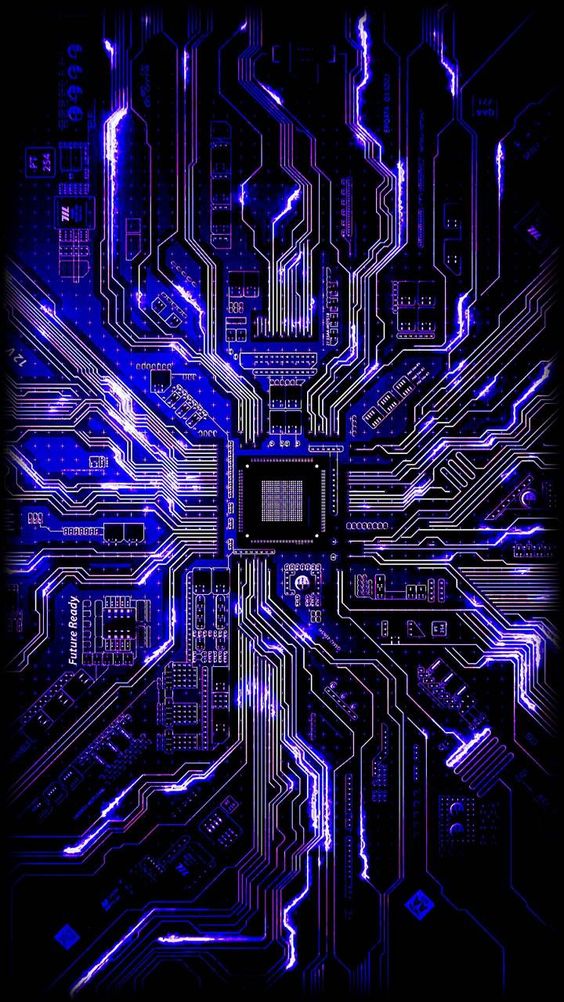
- Open Computer Board image, named it as 'Central Chip'
- Free Transform to resize it to the oval shape
- Place it under Geisha cyborg layer
- Duplicate one computer board layer, named it as 'Computer Lines'
- Free Transform to cover the entire skin edges / Use Stamp Tool to copy & paste
- Create a new layer, named it as 'Gradient'
- Apply Gradient Tool, select radial gradient
- Select blending mode as Screen
- Adjust Opacity
- Geisha Cyborg is done
__________________________________________________________________________________________________________
Week 8 (01/06/20)
This week, Mr. Martin assigned us to upload our proposal of Project 2 Part B in order to have a progression check.
 |
| Figure 19: The photo taken at the beginning.
At the beginning, my photo taken is about the character standing in front of a plain wall. However, Mr. Martin encourages me to take another shot to enhance the visual during the consultation. Yet some points need to be considered while I am retaking the photo:
1. Think of rule of thirds.
2. Pay attention to natural sunlight direction.
3. Avoid overexposed & underexposed.
4. Camera same eye level with character.
5. Background avoid flat plain wall, catch a corner or diagonal line.
6. Smart phone user please zoom in a bit to avoid ultra wide angle.
7. Use tripod, take a photo without character (need it after masking).
|
 |
| Figure 20: The photo taken after the consultation.
After taking this photo, I have sent it to Mr. Martin and eventually get approval of him. Then, I have to proceed with the photo manipulation process.
|
__________________________________________________________________________________________________________
Week 9 (11/06/20)
After applying a myriad of methods and Photoshop techniques, I have successfully transformed my leg into a cyborg.
Week 9 (11/06/20)
After applying a myriad of methods and Photoshop techniques, I have successfully transformed my leg into a cyborg.
 |
| Figure 21: The Outcome of Project 2 (Part B).
First and foremost, I have brighten my leg by adjusting brightness & contrast as well as levels. Besides, I have masked out the middle part of leg and created two oval shapes to create a simple 3D effect. Then, the size of prosthetic leg has been adjusted to match the junction of my calf. In addition, I have cut out a part of skin on thigh to highlight the details especially central chip with fewer electrodes that are hidden under the skin. Some shadows below the skin and the junction of prosthetic leg have also been added to create a more vivid look. After that, I have used pen tool to draw the wires and turn them into stroke paths. Last but not least, I have placed an image of golden machinery under the stroke paths layer. Indeed, I feel a sense of accomplishment after spending hours to develop this leg cyborg.
__________________________________________________________________________________________________________
Week 10 (15/06/20)
This week, Mr. Martin has a consultation as a final review on our cyborg. At the beginning, I am concerned that if the stroke paths will be too complicated. However, Mr. Martin states that it is fine so I don't need to make any changes afterwards. After finish reviewing my work, he is quite satisfied with the outcome as I did.
Overview https://stellahuiyee.blogspot.com/2020/07/blog-post_12.html Project 1 (Week 1-5) https://stellahuiyee.blogspot.com/2020/04/digital-photography-and-imaging.html Lecture and Tutorial (Week 1-6) https://stellahuiyee.blogspot.com/2020/04/digital-photography-and-imaging-lecture_28.html Project 2 (Part A: Week 6-8 / Part B: Week 6-10) https://stellahuiyee.blogspot.com/2020/05/digital-photography-and-imaging-2-koh.html Project 4 (Week 9-14) https://stellahuiyee.blogspot.com/2020/06/project-4-as-you-can-see-claw-is.html Practical (Week 11-14) https://stellahuiyee.blogspot.com/2020/06/blog-post.html |


评论
发表评论